Supply and Demand Strategy 101

5 Steps to High-Probability Trading Zones
I’ve been trading stocks for decades, and if there’s one thing I’ve learned, all the flashy indicators and complex patterns in the world won’t save you if you don’t understand the fundamental forces that move markets: supply and demand. Those squiggly trendlines and colourful oscillators might look impressive, but the battle between buyers and sellers ultimately determines price action.
All the flashy indicators and complex patterns in the world won’t save you if you don’t understand the fundamental forces that move markets.
Mastering supply and demand zones isn’t just about finding good trade entries. It’s about developing a rock-solid trading mindset that keeps you laser-focused on where the big money is flowing. In this post, I’ll break down everything you need to know to trade with the odds on your side.
What Are Supply and Demand Zones?
Let’s cut through the jargon. Supply and demand zones are areas on the chart where prices have historically reacted strongly. Here’s why they form:
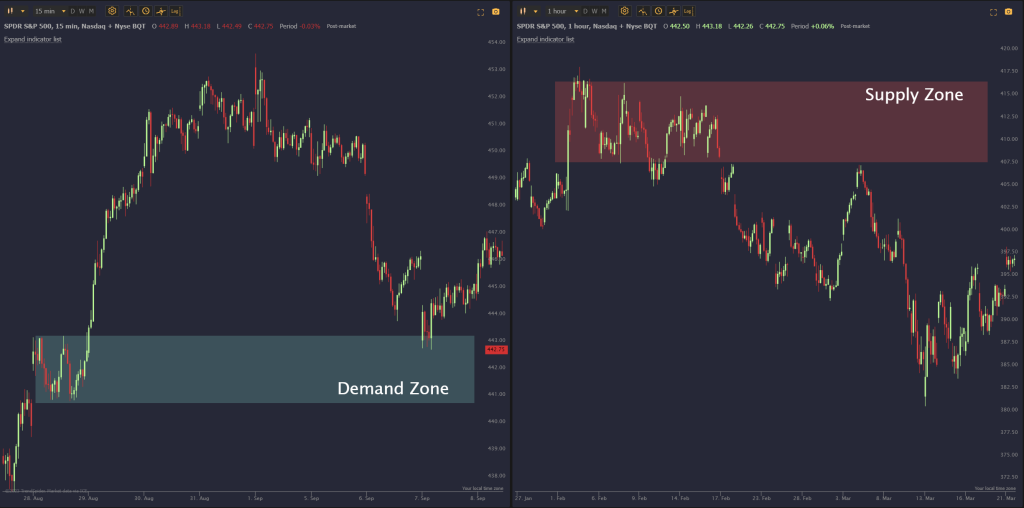
- Demand Zone: A demand zone is where there are more buyers than sellers. Think of this like a sale at your favourite store. Prices drop to a point where buyers rush in, creating a potential floor for the price.
- Supply Zone: A supply zone is where sellers overwhelm buyers. It’s like when a hot new product is released, and people line up to buy it at any price. This excess of buying pressure often creates a temporary price ceiling.

A good example of a “Demand” and “Supply” zone
Why Trade Supply and Demand Zones?
Here’s why I love supply and demand trading:
- Objectivity: Unlike trendlines or chart patterns, which can be subjective, supply and demand zones leave little room for interpretation. They’re based on obvious price action.
- High-Probability Setups: These zones offer excellent risk-to-reward opportunities because they represent areas where institutional money (the big players) have previously shown their hand.
- Flexibility: Supply and demand trading works across all timeframes and markets, from scalping forex to swing trading stocks.
How to Identify High-Probability Supply and Demand Zones
Not all supply and demand zones are created equal. Here’s how to spot the good ones:
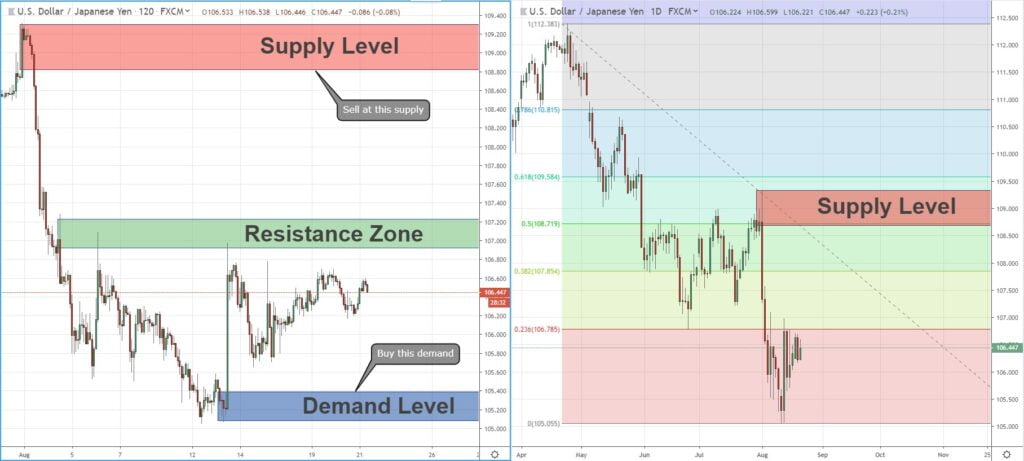
- Look for Fresh Zones: The “fresher” the zone (meaning it hasn’t been tested many times), the stronger it tends to be.
- Seek Confluence: Zones that line up with support/resistance levels or Fibonacci retracements are even more potent.
- Volume Matters: Look for spikes in volume when the price enters a supply or demand zone. This shows institutional interest.

Can you find the fresh zones in this? Bonus points if you can do it in under 5 seconds!
Trading Strategies for Supply and Demand Zones
Now that you can spot high-probability zones, let’s turn them into trades:
- Breakouts: When a price decisively breaks out of a zone, it often signals further movement in that direction.
- Enter on the break with confirmation (like a retest of the broken zone).
- Place your stop-loss just beyond the opposite end of the zone.
- Reversals: When a price enters a zone and is swiftly rejected, it can be a powerful reversal signal, especially if it coincides with other factors.
- Look for candlestick patterns like pin bars or engulfing candles at zones.
- Confluence with other technical levels strengthens these trade setups.
- Fades: Sometimes, you’ll see Price weakly poke into a zone but lack the momentum to break through. This can be a chance to “fade” the move.
- Fade weak breaks on low volume.
- Be cautious of fading strong trends; this is best in ranging markets.
[Image example of each setup: breakout, reversal, fade]
supply and demand are the bedrock of the markets. While mastering this approach takes time and practice, the rewards are well worth it.
Risk Management with Supply and Demand
Supply and demand zones give you great reference points for risk management:
- Stop-loss Placement: Your initial stop-loss should logically go beyond the zone’s boundary. If the zone is breached, it negates your trade idea.
- Position Sizing: Never risk more than you can afford to lose on a single trade. Consistent position sizing (e.g., risking 1% of your account per trade) is crucial for long-term survival.
- Target Setting: Take profits partially at meaningful supply/demand levels or Fibonacci retracements. You can always let some of your position run by trailing your stop.
Advanced Techniques
Ready to level up? Here’s how to sharpen your supply and demand analysis:
- Order Flow Analysis: This involves studying the order book (Level 2 data) to see aggressive buying/selling pressure. It can confirm breakouts or spot potential reversals within zones.
- Volume Profile: This tool adds an extra dimension to your charts, showing volume distribution at different price levels. Look for high-volume nodes within zones to identify key areas of interest.
- Market Profile: A profile uniquely visualises the market structure, highlighting value acceptance and rejection areas. It can complement supply/demand trading.
Important Note: Mastering advanced techniques takes dedicated practice and screen time. Start with the core supply and demand concepts, then layer on these tools as you progress.
After years of trial and error, chasing every hot new trading system, I’ve returned to the core truth: supply and demand are the bedrock of the markets. While mastering this approach takes time and practice, the rewards are well worth it. It’s how you shift from being a gambler who reacts to the market to a trader who anticipates its next move.
Ready to take your trading to the next level? Explore these top forex signals today and see how they can enhance your trading strategy. Continuous learning and adaptation are key to staying ahead in the ever-evolving forex market.
Curious about which forex signals can best support your trading strategy? Join our community at The Signals Oracle, where we provide actionable insights, expert analysis, and a supportive network to help you succeed. Sign up now for our free resources and start your journey towards more informed trading!
Ready to put these skills to the test? Sign up for a trading signals package risk-free today!